Showing posts with label HyperSpin. Show all posts

Sunday, September 15, 2013

My first MAME Cabinet (Part 3)

In this week's blog post I'll take you in to the bowels of El Diablo and show you the actual process involved in transforming an old arcade cabinet in to a MAME cabinet which, hopefully, passes the 'Wife' test (as in will your wife allow you to bring it in to the house when you're done).

So when the cabinet was originally delivered to me, the seller pointed out that a large piece of the arborite (or formica if you're a Yank) had chipped off one of the corners.  After inspecting it further, it would seem that two pieces of arborite had been glued on side-by-side which resulted in a rather obvious seam running from top to bottom.  On top of this, the panelling on this particular side was pretty beaten up.  Also, the arborite on the front panel was cracked and had two button holes drilled into it.  The remaining side had a relatively intact piece of laminate.  Taking all of these factors in to consideration I decided to strip the laminate from all sides in hopes that I could use some of the old laminate to replace the existing laminate on the front panel.  Initially I planned to obtain new laminate sheets to do the sides, but tracking down a distributor who sells to individuals has proven to be very difficult.  In the meantime, I'll use a melamine finish cabinet paint to do the sides, and depending on how that looks, I might be able to just affix side art directly to that.


My first attempt at getting the panelling off in one big piece was a pretty epic fail.  30 year old contact cement is pretty hard, and the panelling itself was pretty brittle.  Trying to use a putty knife to separate the two wasn't working as the putty knife I was using was too narrow.


Using a head gun on the other hand seemed to work pretty well.  It took a long time to heat everything up to the point where the contact cement was soft and pliant, and the fumes were pretty terribad, but the laminate itself was coming away much easier and I was able to use thin sheets of particle board I had lying around to wedge larger portions of the panel away from the cabinet.


Eventually I was able to get the entire sheet away in one piece.  I'll need to clean the old cement off of the back before I can re-apply it, but it should work just fine.  I'll also need to experiment on the best way to cut the panel to size, but I have lots of scrap pieces to work with.  Once I have the front panel cleaned and plugged, I'll use contact cement to glue the laminate on and I'll trim the edges using a router with a trimming bit.  I guess my time co-op'ing at a cabinet making shop might pay off after all.

So now that the sides were taken care of for the time being, I turned my attention to the front panel.  For whatever reason, someone had decided to drill two button holes in to the front, and in doing so chipped the laminate pretty badly.  Also, it seems that the coin door had been installed a few times as there were multiple holes drilled for the studs.  Rather than trying to salvage this, I decided the strip the panel and plug the holes.  Unfortunately, the panel had been screwed & glued to the cabinet itself, so I had to chisel out the supporting blocks in order to get it free.  From what I can tell, three different glues were used to affix the front panel to its various components.


Judging by the expression I don't think the panel was comfortable with what was happening.


With the panel free and stripped I was able to use dowels and wood glue to plug the existing holes.  Once the glue was dry, I cut the plugs flush wit the surface.


At this point I was starting to consider what I would do to prepare the cabinet for paint.  As there was a ton of old contact cement still stuck to the sides, and as particle board would probably suck up any solvent I used, the decision to sand was an easy one.  Next week will cover the prep work I took prior to applying a finish.  If you have any tips on working with arborite/formica/high pressure laminate, please feel free to post!

Sunday, September 1, 2013

My first MAME Cabinet (Step Two - There's so much we can do!)

Nothing says 90's like New Kids on the Block.  Alright, that's not true.  In actuality there are about a million better examples of the 90's, such as Orbitz, The X-Files, Redemption MUD and video game arcades.

In my previous post I covered why I would buy an old beaten up arcade cabinet.  In this post I'll cover some of the things I found upon further inspection.  I'll take off the rose-tinted glasses of nostalgia and start to look at restoring this cabinet as an actual project.

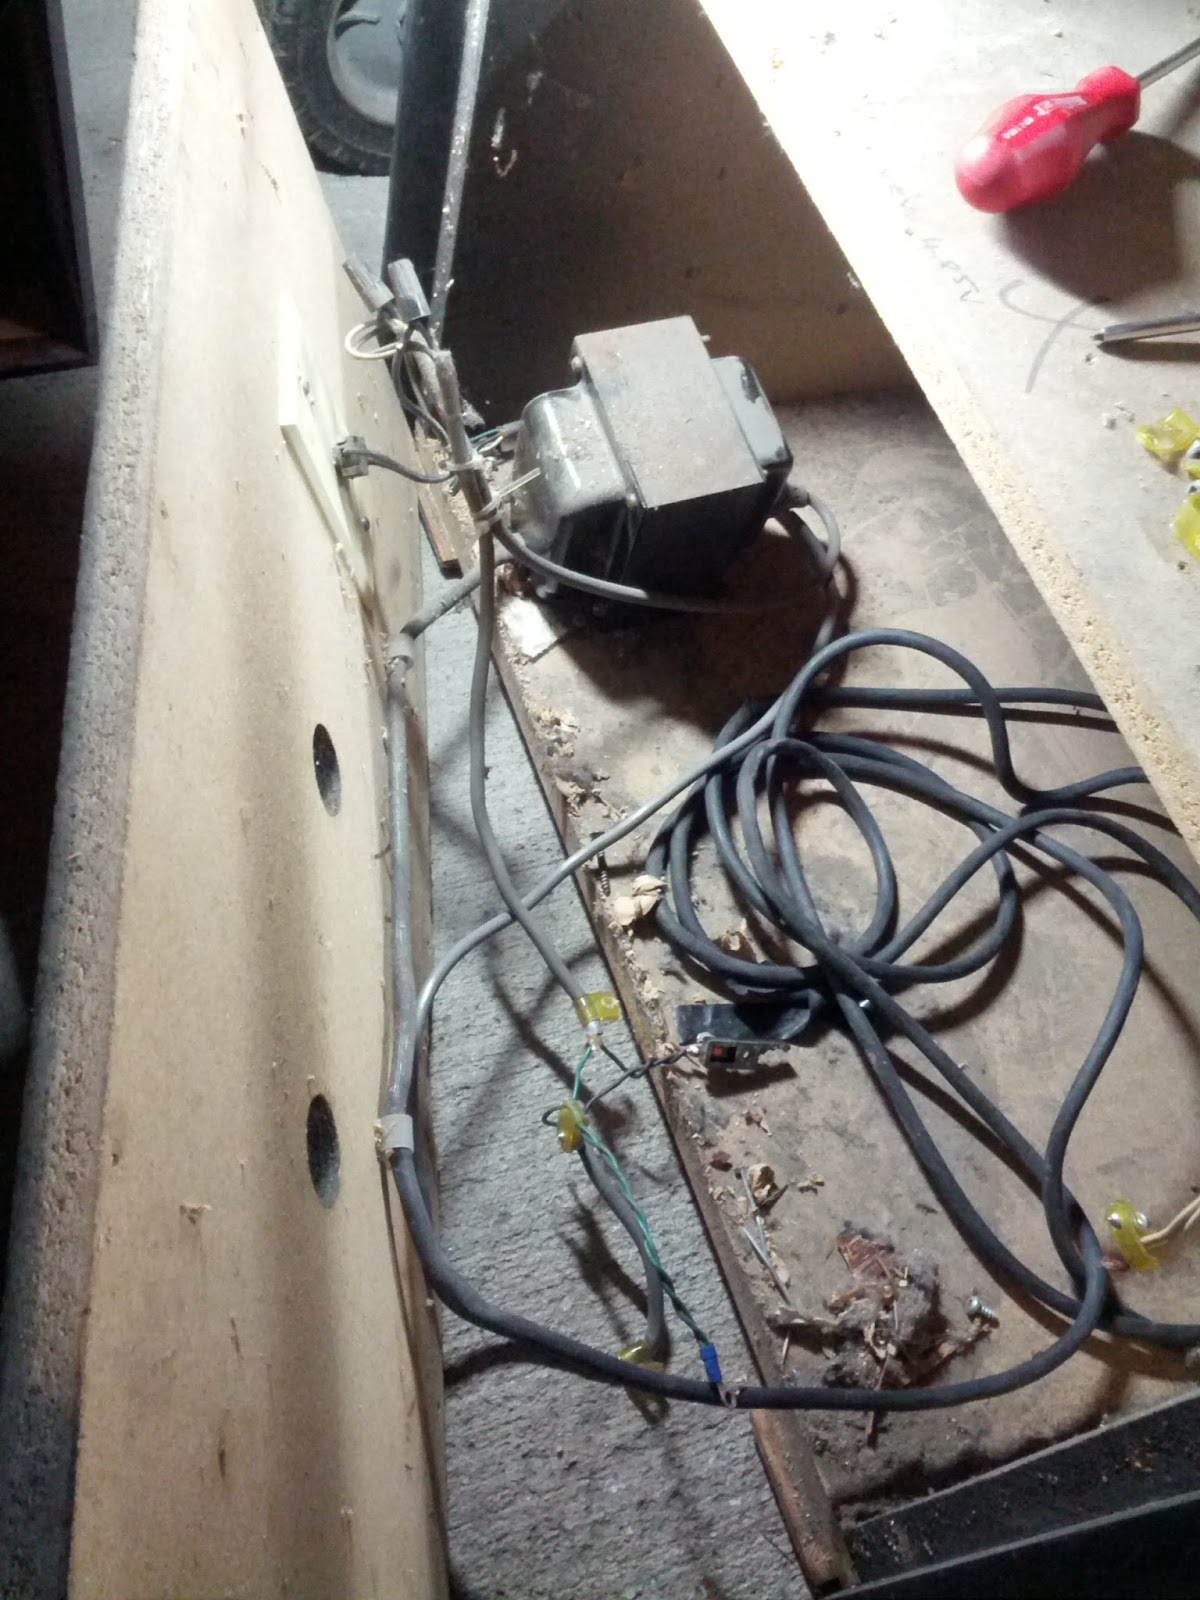
So, to start out I pulled off all of the panels I could.  Once those were off, I could see that no one had done anything productive inside for a long time.


Well, that explains the smell.

The original Isolation Transformer was still affixed to the cabinet, but that's about it.  Having read up on these to figure out what it did, I realized that they're not really worth much.  Apparently Hydro Ontario had mandated that all arcade cabinets had to be equipped with one of these devices, so it would seem that there is no shortage of them.  With today's copper prices it may have a decent scrap value, but I think I'll hang on to it for now.

Hey, remember when Ontario actually made money in the manufacturing sector?

Apart from the 'Frost' brand boat anchor, there really wasn't much there.  Lots of dust bunnies and accumulated crud, a nickle (1981), a dime (1986), some wire anchors, some sort of plastic doo-dad, and some old paper labels.  Oh, and a Bubblicious gum wrapper!  Now we know we're dealing with the real thing.

Is the plastic doo-dad some sort of arcane tool, or just a piece of random garbage?

This picture is pretty terribad, but does anyone recognize those tags?
There was a fixture for a light bulb and a speaker, but neither looked original in any way so I pulled it all out and scrapped it.  In retrospect I probably should have taken a closer look at the speaker, but in my ignorance I just assumed it was a crappy automotive speaker.

Funny I can say 'it didn't look original' when really I have no idea what original was.  Oh well!


Once all that extra wiring had been removed, as well as the plastic wire anchors, I took out the coin mechanism and the connected counter.


At some point someone drilled two holes in the front panel to allow for two push buttons.  I assume these buttons were meant to be for '1-ups'.  Regardless, the saw dust had settled to the bottom of the cabinet and needed to be cleaned out as well.  Within the pile of sawdust there were a few nuts and washers which I assume fell down there when someone was trying to affix the coin mechanism.


The coin mechanism has obviously seen some use, the look of which I really like.  I would like to fill in the holes, presumably drilled for a lock & hasp, but I think matching the original paint will be a job in itself.  It seems that the paint had a kind of dimpled effect so I'll have to see if there's something out there that will match the texture.

The sticker on the back says, "Date of installation July 8th 83 meter 000000"

Despite the mess I'm still really pleased with my purchase and I'm still super excited to get everything cleaned up and looking pretty.  It's kind of fun to think that something that was once housed elsewhere, making money on its own, is now living in my garage.  I wonder where it lived before?  I wonder who played it?  Heck, at this point I wonder what game it was.  Did someone look forward to going to a specific business in hopes that they could beg some quarters from Mom & Dad to play a few rounds on this machine?  In any case I'm hoping I can live up to my name and preserve a piece of the past which many are nostalgic about.

My next article should really get in to the nitty-gritty of getting the cabinet looking good again.  As always, if you see anything in the pics that you can shed some light on, please leave a comment!


Saturday, August 24, 2013

My first MAME cabinet (Part 1)

I grew up in a time when video game arcades were still around, but were starting to fall in to decline.  By the late nineties the internet was a relatively common thing to everyone and on-line gaming was starting to make important strides such as battle.net.  In contrast, an arcade took physical space to rent, required constant maintenance on the machines, required hiring employees to monitor the physical space and had the disadvantage of biased politicians and law makers working to have them shut down.

I can't remember the day where my favourite arcade actually closed, but I know it would have been sometime around 2000.  The 'Tour D'Orleans' arcade was on the second floor of the Place D'Orleans mall, but would have been shut down in order to expand the 'Bay Home Store' which opened in September of 2000.

As a kid I always thought it would the coolest thing in the world to have my own arcade cabinet. Even just one cabinet would be amazing considering how rare and expensive arcade games were. Twenty years later and I'm finally realizing my dream.

Being an adult finally pays off.

This is an old Sega/Gremlin cabinet (I think), either a Frogger or something similar, which I picked up off of Kijiji.

As you can see, there have been some modifications to the original cabinet as someone has drilled two push buttons in to the front panel, and that 'Cobra Command' marquee doesn't seem to be legit. Actually, despite the awesome 80's woody-whack, I don't think the front panel is original at all as it is plywood whereas everything else seems to be MDF.  Oddly enough, the coin mechanism appears to have been in there for a long time judging by the sticker.


Perhaps the front panel was replaced in '83 due to damage.  Or maybe this is just a coin mech from an entirely different cabinet which was thrown in recently.  Who knows!

6367 x .25 = 1591.75 which is not a lot of money considering this thing is 30 years old
The cabinet came missing just about everything.  There is no PCB, no monitor, no side art, no control panel and no power supply.  The laminate on one side has a big chip and a seam, and the front panel has a large crack which seems to be limited only to the laminate panel.  I don't even know how that can happen. Regardless, given how common these cabinets are, and given the condition of the existing parts, I don't feel bad about converting it in to a MAME cabinet.

I'm not putting a ton of research in to where the cabinet came from as really there probably isn't much info to be gathered.  If anyone can confirm the original type of cabinet or game, or maybe provide some insight or where the cabinet could have come from, please comment!

This is after a I cleaned a bunch of black paint off of the serial plate.  '1742' is stamped in but that's about all that is legible apart from 'Serial No'
It's really hard to see but it looks like someone wrote 'Wizard' in magic marker on the back of this reinforcing plate.  I don't remember ever hearing of a 'Wizard' arcade in Ottawa, so maybe this referred to the Coin Op?
Irrespective of where the cabinet came from, it's going to be getting some TLC.  My plan is to use my existing desktop computer for the guts, a 23" LCD monitor, and a 2.1 THX stereo system.  I`ll use HyperSpin as a front end, and I`ll custom build the control panel.

My next post should focus on taking the cabinet apart for cleaning.  Hopefully I`ll find some hidden treasures to show off, but at this point I kind of doubt that I`ll find anything good.